1. Calculate
Choose your project scope and see the estimated price range.
Get a fast 2026 estimate for emergency roof tarping — DIY materials, professional installation, or after-hours emergency service — then compare local contractor quotes.
Instant project estimate
The estimate is free. Additional details are optional.
Complete the project details and calculate to see a price range and next steps.
Clear next step
Choose your project scope and see the estimated price range.
Understand the cost drivers and what impacts your final quote.
Carry your scope into a local quote request if you choose.


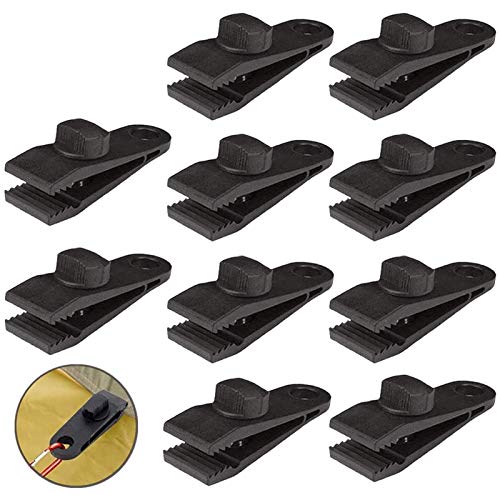
As an Amazon Associate, we earn from qualifying purchases.
Price as of Sep 19, 2026. Product prices and availability are accurate as of the date indicated and are subject to change. Any price and availability information displayed on Amazon at the time of purchase will apply.
Professional roof tarping in 2026 typically runs $300–$600 for a standard single-story job covering 200–400 sqft. Emergency after-hours service pushes costs to $400–$840 for the same area at $1.00–$2.80/sqft. Most contractors charge a minimum call-out fee of $150–$250 regardless of tarp size.
| Service Type | Typical Range (300 sqft) | Per-Sqft Rate |
|---|---|---|
| DIY materials only | $50–$150 | $0.17–$0.50 |
| Professional standard | $300–$600 | $1.00–$2.00 |
| Emergency after-hours | $300–$840 | $1.00–$2.80 |
Five factors drive emergency tarping cost: tarp area (primary driver, scales linearly), service type (DIY vs. pro vs. after-hours), roof pitch (steep >6/12 adds 15–25% labor), stories (multi-story adds 15–25% for ladder access), and region (coastal metros run 20–30% above rural Midwest). A minimum call-out fee of $150–$250 applies to nearly all professional jobs.
| Cost Factor | Impact | Dollar Range Added |
|---|---|---|
| Steep pitch surcharge | +15–25% | +$45–$150 on a $300 job |
| Multi-story access | +15–25% | +$45–$150 on a $300 job |
| After-hours premium | +40–80% | +$120–$480 on a $300 job |
| Coastal labor rate | +20–30% | +$60–$180 on a $300 job |
DIY tarping saves $150–$450 in labor but carries serious safety and insurance risks. Walking a wet or damaged roof without proper fall protection causes hundreds of injuries annually. For single-story homes with a low or standard pitch, an experienced DIYer can tarp safely. For steep roofs, multi-story homes, or active storms, hire a licensed contractor — most insurers also prefer professional installation photos for claim documentation.
Most homeowners insurance policies cover emergency roof tarping as a "mitigation expense" when the underlying damage (storm, hail, wind, fallen tree) is a covered peril. Insurers expect you to act quickly to prevent further water damage — failure to tarp can result in a denied claim for subsequent interior damage. Save all receipts and take timestamped photos before, during, and after installation.
| Damage Cause | Tarping Covered? | Notes |
|---|---|---|
| Wind or hail storm | Usually yes | Standard covered peril |
| Fallen tree | Usually yes | Sudden/accidental damage |
| Normal wear/aging | No | Maintenance exclusion applies |
| Flood (ground water) | No (need NFIP) | Separate flood policy required |
A properly installed 6-mil polyethylene tarp with wood batten anchoring typically lasts 90 days to 12 months depending on UV exposure, wind, and rain volume. Canvas tarps last 2–3 years but cost 3–5× more per sqft. Roofing contractors usually recommend tarp inspection after any major storm and replacement within 30 days of visible deterioration to prevent leaks from compounding interior damage.
Measure the damaged area and add 2–3 feet on all sides for proper overlap and anchoring. A 10×10-foot hole in the roof needs at least a 16×16-foot tarp (256 sqft). For a ridge leak, run the tarp from eave to eave over the ridge, adding 3–4 feet of overhang per side. Most residential storm-damage tarping jobs cover 200–600 sqft, with the national average around 300 sqft.
Inputs
Result
A 200 sqft standard-pitch single-story job in the Midwest falls at the low end of professional pricing. The minimum call-out fee ($150–$250) sets the practical floor, so this estimate assumes the job is large enough to clear that threshold.
Inputs
Result
Emergency service at $1.00–$2.80/sqft on 300 sqft gives $300–$840 before the steep-pitch multiplier (+25%), pushing the estimate to $375–$1,050. A ridge-line or mansard-style roof almost always qualifies as steep, triggering the safety-rigging charge.
Inputs
Result
DIY materials at $0.17–$0.50/sqft on 150 sqft = $26–$75. A 14×16 ft reinforced poly tarp retails for $20–$45 at home centers; add $5–$15 for battens and cap nails. This is the lowest-cost option for experienced DIYers on an accessible flat or low-slope surface.
Cost = Tarp Area (sqft) × Rate ($/sqft) × Pitch Multiplier × Stories MultiplierThe base per-sqft rate depends on service type: $1.00–$2.00 for standard professional installation and $1.00–$2.80 for emergency after-hours. Steep pitch (above 6/12) multiplies cost by ~1.25; multi-story access adds ~1.20. A minimum call-out fee of $150–$250 sets the practical floor for any professional job.
Where:
Tarp Area= Total sqft to be covered, including 2–3 ft overlap on all sides of the damaged zoneRate= $1.00–$2.00/sqft (professional standard) or $1.00–$2.80/sqft (emergency after-hours)Pitch Multiplier= 1.00 for low/standard pitch; 1.25 for steep roofs above 6/12 requiring fall-arrest riggingStories Multiplier= 1.00 for single-story; 1.20 for multi-story homes requiring extended ladder and rigging setupDIY Cost = Tarp Price + Batten Lumber + FastenersDIY cost depends on tarp size and type. A standard blue/silver 6-mil poly tarp runs $0.10–$0.30/sqft of tarp material. Add 2×4 batten boards at $0.50–$1.00 per linear foot of perimeter and cap nails at $5–15 per box. Total for a 300 sqft area typically lands at $50–$150 in materials.
Where:
Tarp Price= 6-mil poly: $20–$60 for 300 sqft coverage; heavy-duty reinforced: $60–$120Batten Lumber= 2×4 pressure-treated boards along tarp edges to anchor against wind; ~$0.50–$1.00/ftFasteners= Roofing cap nails or plastic cap screws; typically $5–$15 per box covering one jobThe national average for professional roof tarping in 2026 is approximately $450 for a 300 sqft single-story job at a standard pitch — a figure derived from contractor pricing data across Angi, HomeGuide, and Fixr. That midpoint, however, masks a wide spread: DIY materials run as low as $50–$150, while emergency after-hours service on a steep multi-story roof can reach $1,500–$3,000.
Per-sqft rates give the clearest benchmark for comparison shopping. Standard professional installation runs $1.00–$2.00/sqft for material and labor combined. Emergency or after-hours service, which involves dispatching a crew outside normal business hours — evenings, weekends, and holidays — runs $1.00–$2.80/sqft, with the top of that range typically applying to steep roofs or hard-to-access properties in high-cost metro areas. DIY materials alone cost $0.17–$0.50/sqft for a 6-mil polyethylene tarp plus batten lumber and fasteners.
| Service Type | Per-Sqft Rate | Typical 300 sqft Job |
|---|---|---|
| DIY materials only | $0.17–$0.50 | $50–$150 |
| Professional standard | $1.00–$2.00 | $300–$600 |
| Emergency after-hours | $1.00–$2.80 | $300–$840 |
Most professional roofing contractors apply a minimum call-out fee of $150–$250 regardless of tarp size — small jobs under 150 sqft rarely cost less than this floor even if the per-sqft math suggests otherwise.
Tarp area is the primary lever — every additional sqft adds $1.00–$2.80 in professional labor and materials depending on service type. The other four factors are pitch, stories, service timing, and region. Understanding each helps you evaluate bids critically and avoid overpaying for a job that a competent contractor should complete in two to four hours.
Roof pitch is the most frequently cited hidden cost. A standard 5/12 pitch (walkable without special rigging) is priced at a 1.0 baseline. A steep pitch above 6/12 — which includes many Victorian, Tudor, and colonial home styles — requires OSHA-compliant fall-arrest equipment and slower, more careful crew movement. Expect a 15–25% surcharge, which on a $400 job adds $60–$100. Multi-story access adds a similar 15–25% for ladder rigging, longer material hauls, and higher risk.
DIY tarping saves $150–$450 in labor on a typical job and is a viable option for experienced homeowners with the right equipment. The core materials — a 6-mil reinforced poly tarp, 2×4 pressure-treated battens, and roofing cap nails — cost $50–$150 at any home center and can be installed in two to three hours on a low or standard pitch in dry conditions. The completed tarp should overlap the damaged area by at least 2–3 feet on all sides, with battens nailed through the tarp into decking along every edge to resist wind lift.
The case for hiring a professional is strong the moment any of three conditions apply: pitch above 6/12, more than one story, or active or recently ended precipitation. Wet roofs and steep slopes are the leading cause of residential fall fatalities in the US. Beyond safety, professional installation provides a paper trail — timestamped receipt, contractor insurance certificate, before-and-after photos — that most adjusters require or strongly prefer when processing a claim. If your insurer is covering the tarp cost, professional installation often pays for itself in claim documentation value alone.
Insurance tip: snap timestamped photos of the damage before any tarp work begins. Photos taken after the tarp is installed can obscure the original damage scope and complicate your claim.
The most common question homeowners ask after storm damage is whether their insurance will pay for the tarp. The short answer: yes, in most cases, when the damage source is a covered peril. A standard HO-3 homeowners policy covers sudden and accidental damage from wind, hail, lightning, and falling objects. Tarping that prevents further damage from spreading to the interior of the home qualifies as a "mitigation of loss" expense, and most carriers reimburse it — typically after the deductible.
The critical caveat is timing. Insurers expect prompt action. A roof left open for 48–72 hours after a storm, allowing water to saturate insulation, rot joists, and mold drywall, can give the adjuster grounds to attribute part of the interior damage to "failure to mitigate" — which can shift that portion of the loss to the homeowner. Tarp quickly, document thoroughly, and submit receipts with your claim.
| Damage Cause | Tarping Covered? | Action Required |
|---|---|---|
| Wind or hail storm | Usually yes | File promptly; keep tarp receipt |
| Fallen tree or branch | Usually yes | Photograph branch in place before removal |
| Age or wear-and-tear | No | Maintenance exclusion; out-of-pocket |
| Flood (rising water) | No (needs NFIP) | File with NFIP flood policy instead |
The most common DIY mistake is buying a tarp that is too small. You need at least 2–3 feet of overhang beyond the visible damage on all sides to create a proper weather seal and provide enough material to batten down securely. A 10×10-foot hole in the roof surface requires at minimum a 16×16-foot tarp (256 sqft). For a ridge leak that runs along the peak, measure the full eave-to-eave width of the roof and add 4–6 feet per side for overhang — a 30-foot wide house might need a 14×40-foot tarp (560 sqft).
Tarp sizes at home improvement stores jump in 2-foot increments: 8×10, 10×12, 12×16, 16×20, and so on. Always round up to the next size rather than cutting a larger tarp, as the factory-finished edges are water-sealed and cut edges are not. Heavy-duty 10- to 12-mil poly tarps cost 2–3× more per sqft than standard 6-mil blue tarps but last 12–24 months longer in exposed conditions — worth the premium if the permanent repair will take more than 30 days.
Order 20% more tarp area than your damage measurement suggests. Overlap at ridges, valleys, and penetrations (vents, chimneys, skylights) eats more material than most homeowners expect.
Read our guide
Read our guide
Read our guide
Price emergency tarping, roof repairs, storm damage remediation, and full replacement projects with our construction estimator suite.
Last Updated: Sep 19, 2026
This calculator is provided for informational and educational purposes only. Results are estimates and should not be considered professional financial, medical, legal, or other advice. Always consult a qualified professional before making important decisions. UseCalcPro is not responsible for any actions taken based on calculator results.