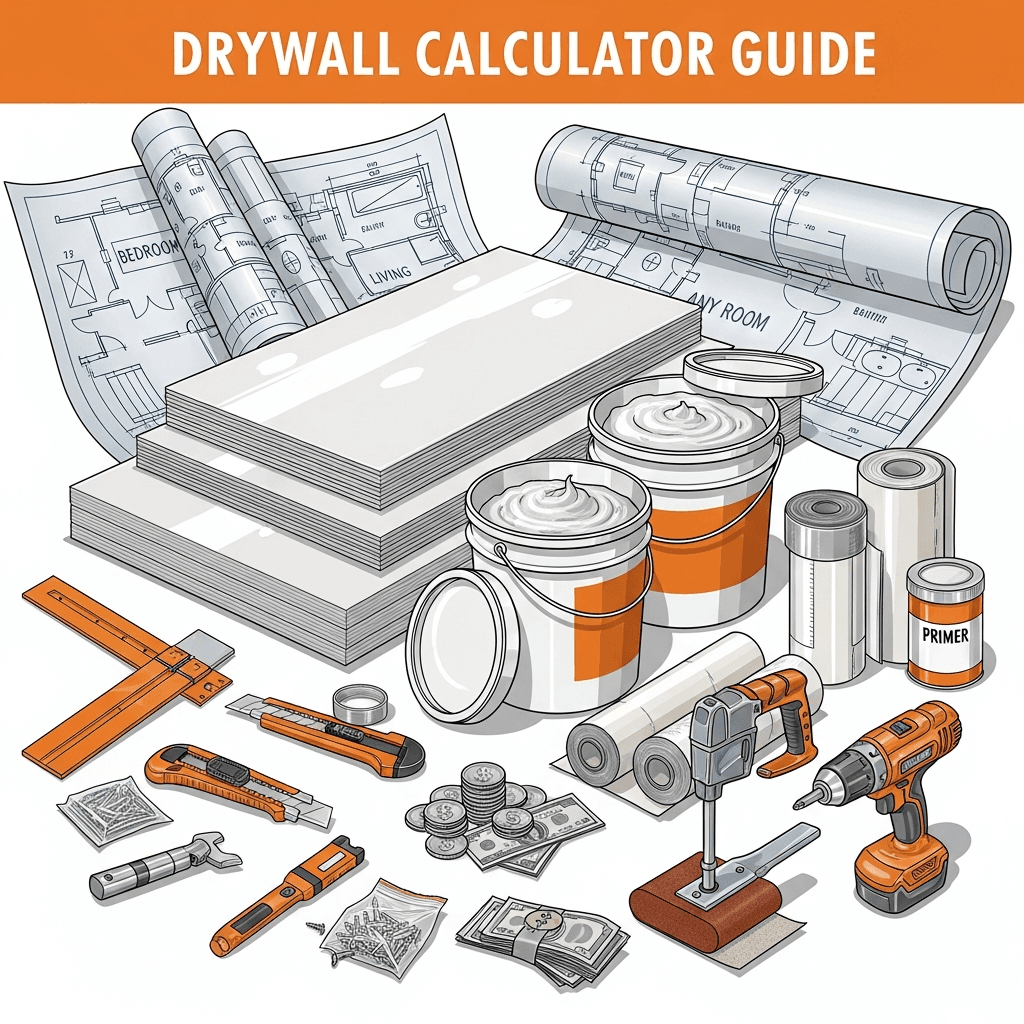
Drywall Calculator Guide: Sheets, Mud, Tape & Cost for Any Room
A standard 12x12 room needs approximately 18 sheets of 4x8 drywall for walls and ceiling. Each 4x8 sheet covers 32 square feet, and a typical room with 8-foot ceilings requires about 576 square feet of wall area plus 144 square feet of ceiling. Factor in 10-15% waste for cuts around doors, windows, and outlets, and you get a reliable material estimate before heading to the lumberyard.
When I drywalled my first basement two years ago -- 850 square feet of open space with a drop ceiling grid -- I ordered 22 sheets of 4x8 and thought I had plenty. I was wrong about the joint compound. I ran through 3 gallons in two days and had to make an emergency run for 2 more, which set me back half a day and $45. That project taught me that accurate material estimation goes far beyond counting sheets; the mud, tape, and screws matter just as much, and underestimating any one of them stalls the entire job.
Use our Drywall Calculator to get precise quantities for sheets, joint compound, tape, and screws based on your exact room dimensions.

How to Measure a Room for Drywall
Accurate measurements are the foundation of every drywall estimate. A small measurement error multiplied across four walls and a ceiling can mean the difference between one extra trip to the store and a smooth weekend project.
Step 1: Measure Each Wall
Measure the length and height of every wall in the room. Record each wall separately rather than relying on a single perimeter measurement, because most rooms are not perfectly square.
Formula for total wall area:
Wall Area = (Wall 1 Length × Height) + (Wall 2 Length × Height) + ...
Example for a 12x14 room with 8-foot ceilings:
Wall area = (12 × 8) + (14 × 8) + (12 × 8) + (14 × 8)
Wall area = 96 + 112 + 96 + 112 = 416 sq ft
Step 2: Measure the Ceiling
If you are drywalling the ceiling, calculate its area separately:
Ceiling Area = Room Length × Room Width
Continuing our example:
Ceiling area = 12 × 14 = 168 sq ft
Step 3: Subtract Openings
Subtract the area of doors, windows, and any other openings you will not be covering:
| Opening Type | Typical Size | Area to Subtract |
|---|---|---|
| Standard interior door | 3' x 7' | 21 sq ft |
| Double door / closet | 6' x 7' | 42 sq ft |
| Standard window | 3' x 4' | 12 sq ft |
| Large window | 4' x 5' | 20 sq ft |
| Sliding glass door | 6' x 7' | 42 sq ft |
Our example room with 1 door and 2 windows:
Openings = 21 + (2 × 12) = 45 sq ft
Net wall area = 416 - 45 = 371 sq ft
Total drywall area = 371 + 168 = 539 sq ft
Step 4: Add Waste Factor
Always add 10-15% for waste from cuts, damaged pieces, and fitting around outlets, switches, and corners:
539 × 1.10 = 593 sq ft (with 10% waste)
Tip
Measure twice, order once. Sketch each wall on paper with dimensions and mark all openings. This drawing becomes your cutting plan later, saving time and reducing waste.
Choosing the Right Drywall Size & Thickness
Drywall comes in several sizes and thicknesses. Choosing the right combination reduces waste, simplifies installation, and meets building code requirements.
Sheet Size Comparison
| Sheet Size | Coverage | Weight (1/2") | Best Use Case |
|---|---|---|---|
| 4' x 8' | 32 sq ft | ~57 lbs | Standard rooms, DIY projects, tight spaces |
| 4' x 10' | 40 sq ft | ~71 lbs | 9-foot or 10-foot ceilings, fewer joints |
| 4' x 12' | 48 sq ft | ~85 lbs | Long walls, commercial work, professional crews |
Longer sheets mean fewer joints to tape and finish, but they are heavier and harder to handle. For most DIY projects, 4x8 sheets are the practical choice.
Thickness Options
| Thickness | Weight per 4x8 Sheet | Primary Application |
|---|---|---|
| 1/4" (6.35 mm) | ~38 lbs | Curved walls, overlay on existing drywall |
| 3/8" (9.5 mm) | ~44 lbs | Interior walls in some older homes, repairs |
| 1/2" (12.7 mm) | ~57 lbs | Standard walls with studs 16" on center |
| 5/8" (15.9 mm) | ~70 lbs | Ceilings, fire-rated walls, soundproofing, studs 24" on center |
Important
5/8-inch drywall is required for ceilings with joists spaced 24 inches on center. Using 1/2-inch on wide-spaced joists leads to sagging over time. Check your joist spacing before buying. The International Residential Code (IRC) Section R702 specifies wall covering requirements including minimum thicknesses and fastener schedules.
Specialty Drywall Types
- Moisture-resistant (green board): For bathrooms, laundry rooms, and kitchens near sinks
- Mold-resistant (purple board): High-humidity areas prone to mold growth
- Fire-resistant (Type X): Garage walls adjacent to living spaces, furnace rooms
- Soundproof: Layered or specialty boards for home theaters and bedrooms sharing walls
Calculating Drywall Sheets, Mud, Tape & Screws
Once you know your total square footage, convert that into a complete materials list. The Gypsum Association publishes standard installation guidelines that inform these ratios.
Sheets Calculation
Formula:
Sheets = Total Square Footage ÷ Sheet Size (sq ft)
Our 12x14 room example (593 sq ft with waste):
Sheets = 593 ÷ 32 = 18.5 → Order 19 sheets of 4x8
Materials Per 100 Square Feet
Use this table to estimate all supporting materials once you know your total area:
| Material | Quantity per 100 sq ft | Notes |
|---|---|---|
| Drywall sheets (4x8) | 3.5 sheets | Includes ~10% waste |
| Drywall screws | 1.5 lbs (~75 screws) | 1-1/4" for 1/2" drywall |
| Joint tape | 37 feet | Paper or mesh |
| Joint compound (mud) | 0.7 gallons | All-purpose, pre-mixed |
| Corner bead | As needed per corner | ~1 piece per 8 ft of outside corner |
For our 593 sq ft example:
- Sheets: 19 (already calculated)
- Screws: 593 ÷ 100 × 1.5 = ~9 lbs of screws
- Tape: 593 ÷ 100 × 37 = ~220 feet of tape
- Mud: 593 ÷ 100 × 0.7 = ~4.2 gallons of joint compound
- Corner bead: Count your outside corners
Warning
Joint compound quantities are easy to underestimate. The table above covers basic taping and one finish coat. If you plan to skim-coat the entire surface or you are a beginner who needs extra passes, add 30-50% more mud. According to USG (United States Gypsum), the industry standard for a Level 4 finish is approximately 0.07 gallons per square foot of drywall area.
Screw Spacing Guidelines
Proper screw placement ensures panels stay flat and secure:
- Walls: Every 16 inches along studs, starting 3/8" from edges
- Ceilings: Every 12 inches along joists
- Edges: Every 8 inches along panel edges for walls, every 7 inches for ceilings
- Screw type: Use #6 fine-thread drywall screws, 1-1/4" for 1/2" drywall, 1-5/8" for 5/8" drywall
Insulation Before Drywall: What You Need to Know
Before hanging a single sheet, most wall cavities need insulation. This step happens after framing and electrical/plumbing rough-in but before drywall installation.
Common Insulation Types for Walls
| Insulation Type | R-Value per Inch | Best For |
|---|---|---|
| Fiberglass batts | R-3.2 to R-3.8 | Standard 2x4 and 2x6 walls |
| Mineral wool batts | R-3.7 to R-4.2 | Soundproofing, fire resistance |
| Spray foam (closed-cell) | R-6.0 to R-7.0 | Basements, rim joists, air sealing |
| Spray foam (open-cell) | R-3.5 to R-3.7 | Interior walls, attics |
| Rigid foam board | R-3.8 to R-6.5 | Basement walls, exterior sheathing |
For a detailed breakdown of R-values and insulation selection, see our guide on insulation R-values explained. Our Insulation Calculator can help you determine the right amount of insulation for each wall cavity.
Tip
Install insulation after all rough-in inspections pass. Electrical and plumbing inspectors need to see the work before it gets covered. Installing drywall too early means tearing it back out if an inspection fails.
Vapor Barriers
In cold climates (IRC Climate Zones 5-8), a polyethylene vapor barrier is typically required on the warm side of insulation before drywall installation. In warmer climates, a kraft-faced batt may be sufficient. Check your local building codes for specific requirements.
Finishing Touches: Baseboards, Trim & Caulk
Once drywall is hung, taped, and finished, your room still needs trim work to complete the look. Planning these materials alongside drywall keeps your project on schedule.
Baseboards
Measure the perimeter of your room and subtract for doorways:
Baseboard linear feet = Room perimeter - Door openings
Our 12x14 room:
Perimeter = (12 + 14) × 2 = 52 feet
Minus 1 door (3 feet) = 49 linear feet of baseboard
Use our Baseboard Calculator to get exact quantities including miter-cut waste.
Caulk
You will need caulk where drywall meets trim, around windows, and at ceiling-to-wall transitions if not using crown molding. A standard 10-oz tube of paintable caulk covers about 25-30 linear feet.
Our example room needs approximately:
- Ceiling line: 52 feet (if no crown molding)
- Baseboard top edge: 49 feet
- Total: ~101 linear feet = 4 tubes of caulk
Our Caulk Calculator handles these estimates for you.
Drywall Cost Breakdown by Room
Material costs vary by region and fluctuate with lumber markets, but these ranges give you a solid planning estimate for 2026 pricing.
Cost per Sheet (1/2" Standard)
| Sheet Size | Average Price | Price per sq ft |
|---|---|---|
| 4' x 8' | $12 - $16 | $0.38 - $0.50 |
| 4' x 10' | $15 - $20 | $0.38 - $0.50 |
| 4' x 12' | $18 - $24 | $0.38 - $0.50 |
Specialty drywall costs more:
- Moisture-resistant: Add $3-5 per sheet
- Fire-rated (Type X): Add $2-4 per sheet
- Mold-resistant: Add $5-8 per sheet
Room Cost Estimates (Materials Only)
| Room Type | Area (sq ft) | Sheets (4x8) | Mud + Tape + Screws | Total Materials |
|---|---|---|---|---|
| Small bathroom (5x8) | ~210 | 7 | $25 - $35 | $110 - $150 |
| Bedroom (12x12) | ~540 | 17 | $55 - $70 | $260 - $340 |
| Basement (20x30, walls only) | ~800 | 25 | $80 - $100 | $380 - $500 |
| Two-car garage (20x22) | ~720 | 23 | $70 - $90 | $345 - $460 |
Important
These estimates cover materials only. Professional installation typically costs $1.50 - $3.00 per square foot for hanging and finishing, which can double or triple the material cost. A 12x12 bedroom that costs $300 in materials might run $1,100 - $1,900 installed.
Supporting Materials Cost Breakdown
| Material | Unit | Price Range |
|---|---|---|
| Joint compound (pre-mixed, 4.5 gal) | Bucket | $14 - $20 |
| Paper joint tape (250 ft roll) | Roll | $3 - $5 |
| Mesh joint tape (150 ft roll) | Roll | $5 - $8 |
| Drywall screws (1 lb box, ~200 ct) | Box | $6 - $9 |
| Corner bead (8 ft metal) | Piece | $2 - $4 |
| Corner bead (8 ft paper-faced) | Piece | $3 - $5 |
| Sanding sponge / screen | Each | $3 - $6 |
Step-by-Step Drywall Installation Tips
Whether you are a first-timer or experienced DIYer, following these steps in order leads to professional-looking results.
Step 1: Prepare the workspace. Remove all furniture, cover floors with drop cloths, and ensure the room is clean. Confirm that all electrical boxes, plumbing, and HVAC rough-ins are complete and inspected.
Step 2: Mark stud locations. Use a stud finder and snap chalk lines on the floor and ceiling to identify every stud and joist. Mark them clearly so you know exactly where to drive screws.
Step 3: Start with the ceiling. Ceiling panels go up first because wall panels will support the ceiling edges. Use a drywall lift or T-braces to hold panels against joists while screwing them in. Stagger end joints so they do not align from row to row.
Step 4: Hang the top wall panels. Install the top row of wall panels tight against the ceiling. Panels should run perpendicular to studs when possible, which provides more structural strength and fewer joints to finish.
Step 5: Hang the bottom wall panels. Leave a 1/2-inch gap at the floor (baseboards will cover this). Use a drywall foot lifter to push panels tight against the upper row.
Step 6: Cut around outlets and switches. Measure from reference points (adjacent panel edges, floor, or ceiling) to mark outlet locations. Cut with a drywall saw or rotary tool. Test-fit before screwing the panel in place.
Step 7: Apply first coat of mud and tape. Embed paper tape into a thin layer of joint compound over all seams. Smooth with a 6-inch taping knife. Cover all screw heads with a thin coat.
Step 8: Apply second coat. After the first coat dries (24 hours), apply a wider second coat using an 8-inch or 10-inch knife. Feather the edges to blend into the surrounding drywall.
Step 9: Apply finish coat and sand. Apply a thin final coat with a 12-inch knife. Once dry, sand lightly with 120-150 grit sandpaper or a sanding sponge. Wipe dust with a damp cloth before priming.
Tip
Butt joints are the hardest to hide. Wherever two non-tapered edges meet, the joint sits higher than the surrounding surface. Minimize butt joints by using the longest sheets that will fit, and stagger them so butt joints on adjacent rows do not line up.
If you are planning a full room renovation that includes building a deck off the same area, our deck building guide covers material estimation for the outdoor portion of your project.
How to Use Our Drywall Calculator
Our Drywall Calculator takes the guesswork out of material estimation:
- Enter room dimensions -- length, width, and ceiling height
- Specify doors and windows -- the calculator subtracts these from total area
- Choose sheet size -- 4x8, 4x10, or 4x12
- Select options -- include ceiling, choose drywall type
- Get your complete list -- sheets, joint compound, tape, screws, and estimated cost
The calculator automatically applies a waste factor and rounds up to whole sheets so you know exactly how many to buy. It also breaks down supporting materials so nothing gets forgotten at the store.
For painting after your drywall is complete, our paint calculator guide explains how to estimate primer and paint quantities for freshly finished walls.
Frequently Asked Questions
How many sheets of drywall do I need for a 12x12 room?
A 12x12 room with 8-foot ceilings and one door requires approximately 17-18 sheets of 4x8 drywall for walls and ceiling. The walls total about 384 square feet (minus the door opening) and the ceiling adds 144 square feet, for roughly 507 square feet of coverage. With 10% waste, plan on 18 sheets.
What thickness of drywall should I use for ceilings?
Use 5/8-inch drywall for ceilings, especially when joists are spaced 24 inches on center. The thicker board resists sagging better than 1/2-inch. For joists at 16 inches on center, 1/2-inch is acceptable but 5/8-inch still provides a flatter, more durable ceiling.
How much joint compound do I need per sheet of drywall?
Plan on approximately 0.2 gallons (about 3 cups) of pre-mixed joint compound per 4x8 sheet for a standard three-coat finish. For a 20-sheet room, that means roughly 4 gallons of mud. Beginners should add 30-50% extra because thicker application and extra passes consume more compound.
Can I install new drywall over old drywall?
Yes, you can overlay new 1/4-inch or 3/8-inch drywall over existing drywall if the old surface is sound and securely fastened. Use longer screws (1-5/8" minimum) that penetrate into the studs behind both layers. However, this adds weight -- verify that your framing can support the additional load, and check that door jambs and window casings can accommodate the extra thickness.
Do I need moisture-resistant drywall in bathrooms?
Yes. Moisture-resistant drywall (green board) is recommended for bathroom walls that will not receive direct water contact. For areas directly behind tub and shower surrounds, cement backer board is the proper substrate -- standard drywall and even green board will fail with sustained moisture exposure. Local building codes typically specify which areas require which materials.
How do I estimate the number of drywall screws I need?
A reliable rule of thumb is 28-32 screws per 4x8 sheet. This accounts for screws every 16 inches in the field and every 8 inches along edges, assuming studs at 16-inch centers. For 20 sheets, you need approximately 600 screws, or about 3 pounds of 1-1/4-inch drywall screws. Buying a 5-pound box ensures you have enough without running short.
Related Calculators
- Drywall Calculator -- Calculate sheets, mud, tape, and screws for any room
- Insulation Calculator -- Estimate insulation batts or rolls before hanging drywall
- Baseboard Calculator -- Calculate baseboard and trim materials after drywall is finished
- Caulk Calculator -- Estimate caulk for sealing trim and transitions
Related Articles
- Paint Calculator Guide -- Estimate primer and paint for freshly drywalled walls
- Insulation R-Value Guide -- Choose the right insulation before hanging drywall
- Deck Building Complete Guide -- Material estimation for outdoor construction projects
Drywall material estimates are based on standard residential construction practices and typical waste factors. Actual quantities may vary based on room layout complexity, installer experience, and local building code requirements. Consult with your building supply retailer or a licensed contractor for project-specific recommendations.
This article is provided for informational and educational purposes only. Content should not be considered professional financial, medical, legal, or other advice. Always consult a qualified professional before making important decisions. UseCalcPro is not responsible for any actions taken based on the information in this article.
Try These Calculators
Estimate drywall sheets, joint compound, screws, and tape for walls and ceilings. Enter room dimensions to get a complete material list for your project.
Estimate 2026 drywall install cost by square footage and finish level. Hang + finish runs $1.50 to $3.50 per sqft; 1,000 sqft job is $2,000 to $3,500.
Calculate how many bricks you need for walls, patios, and projects. Enter wall dimensions and brick size to get accurate material and mortar estimates.
Calculate how many light fixtures you need and optimal grid spacing for any room. Get lumens requirements by room type and annual energy cost estimates.
Calculate grow light wattage, number of fixtures, and monthly electricity costs for your indoor garden. Covers LED, HPS, fluorescent, and CMH light types.